Outlining Your Screenplay Your Way
February 6, 2024
Outlining your story before writing a screenplay is a vital tool that will save you time and energy. Not only will it help you in terms of structuring your narrative, you’re less likely to have a “second act slump” if you plotted all of the major story beats beforehand. Outlining also frees up your mind when you’re actually writing your script: you won’t be constantly thinking "What happens next?" Instead, you can focus on how things happen.
While outlining is an important facet of screenwriting, it's important to keep an open mind. During the writing process, you’ll likely discover certain things that worked in your outline don’t work as well in a written set piece or dialogue exchange. You might also get new ideas and rethink certain things (e.g., you come up with an even better ending!). It's best not to hold back your imagination. When inspiration hits, embrace it for all its worth.
An outline is a helpful tool, but—like the screenplay you’re writing—you should feel free to modify it whenever you want. Your outline should be compatible with your sensibilities and thought process.
What Works Best For You
We’re all wired differently: one working method for a writer might not work for another writer. This is even the case when it comes to outlining your screenplay. Some writers might prefer just outlining the basic three-act structure of their narrative and the most significant story beats. Other writers might want a more detailed outline and even lay out every scene before “going to script.”
In the same way, it’s important for writers to create a personal work routine, it’s important to outline your script in a fashion that’s comfortable and intuitive to how you think. The goal of outlining is to make the writing process easier, not more difficult.
The way you best process information should be taken into consideration when outlining. Do you find visual guides helpful when looking for instruction? If this is the case, creating an outline that you can easily reference while writing your script might be beneficial to you.
Read More: Tech Tip: 1-2-3 Method
Your Outline and Screenplay in One Program
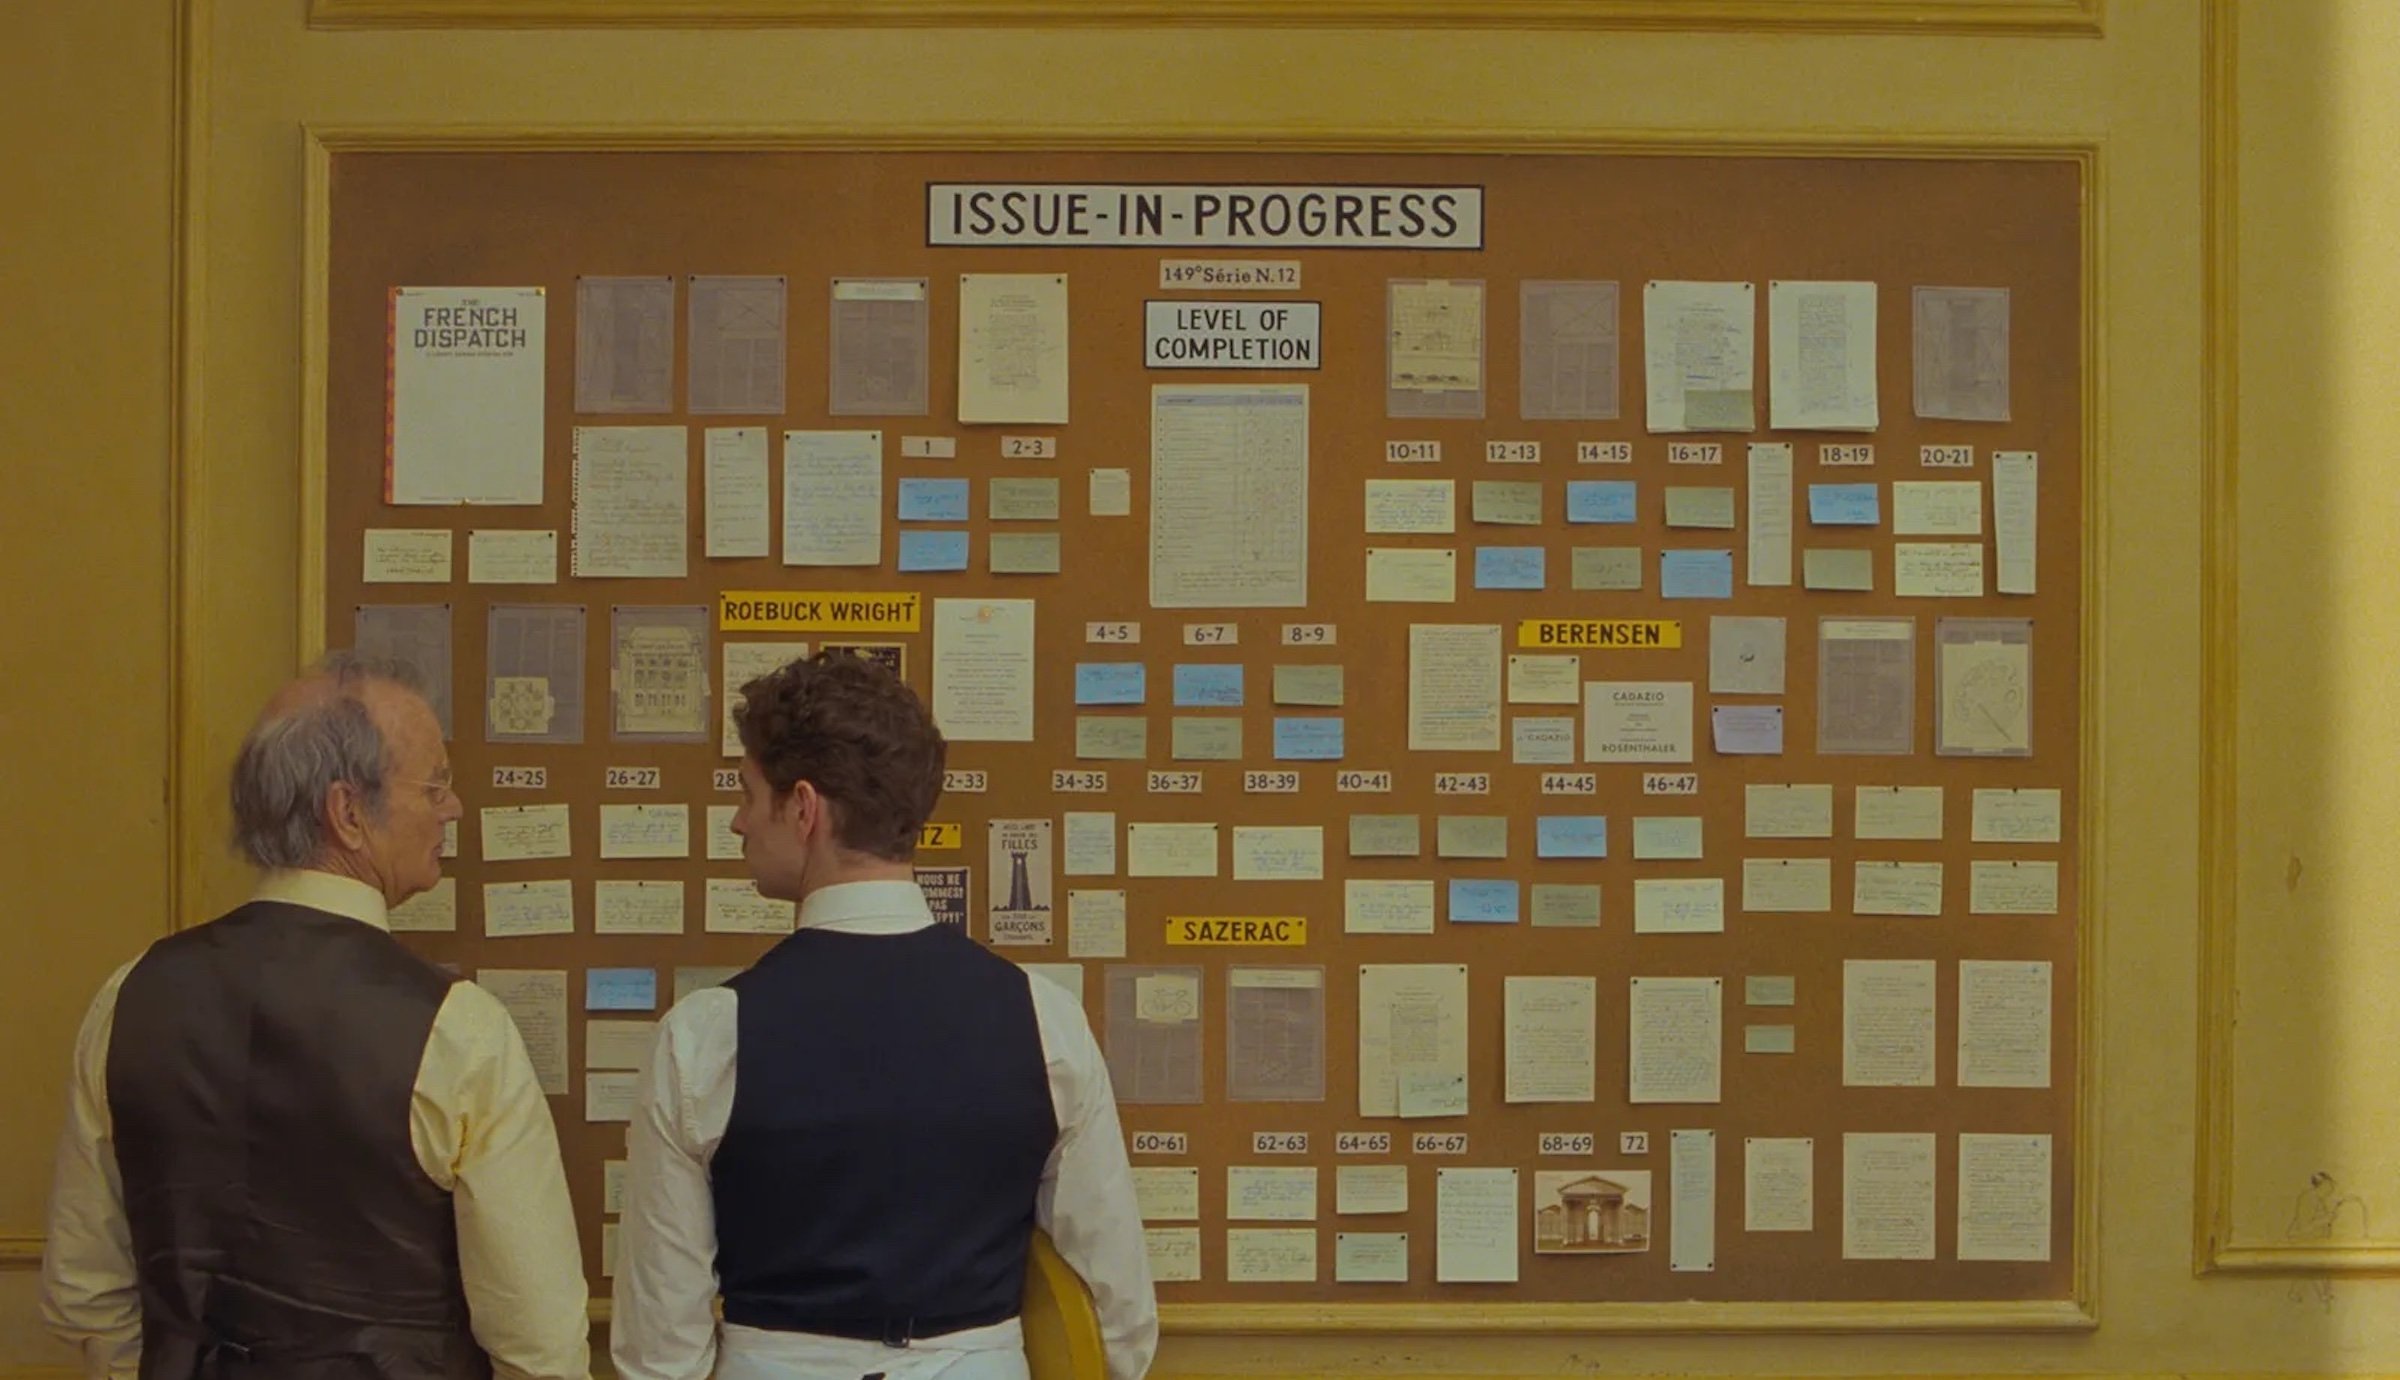
In the past, screenwriters created outlines in separate documents or pinned a bunch of index cards on their wall for quick reference. However, thanks to the Outline Editor feature in Final Draft, you can have your outline and screenplay in the same program. You can even integrate your outline into your script for further convenience.
This is especially helpful for writers who respond well to visual guides and work best when following a clear and concise road map.

The Outline Editor is located directly beneath the Toolbar, and it works in conjunction with the Beat Board. The Beat Board is where you can create the beats for your screenplay (smaller story events that happen within a larger sequence). Think of each beat as a virtual index card and the Beat Board as a virtual wall. You can easily toggle from Script View to the Beat Board via the View menu.
You can choose to show or hide the Outline Editor (also via the View menu) and change its size by hovering over it and using a resize cursor to drag up and down. You can also use the Zoom slider to change the size of the Outline Editor to match your visual preference.
To integrate your outline into your script, simply click the “Send Outline to Script” button on the Outline Editor’s left panel. After doing so, the content of the Outline Editor and the Beat Board will appear in your screenplay as outline elements. Start fleshing out the document with other script elements (scene headings, action, dialogue, etc.), and before you know it, you’ll have a finished rough draft!
Using The Outline Editor to Map Out Your Screenplay
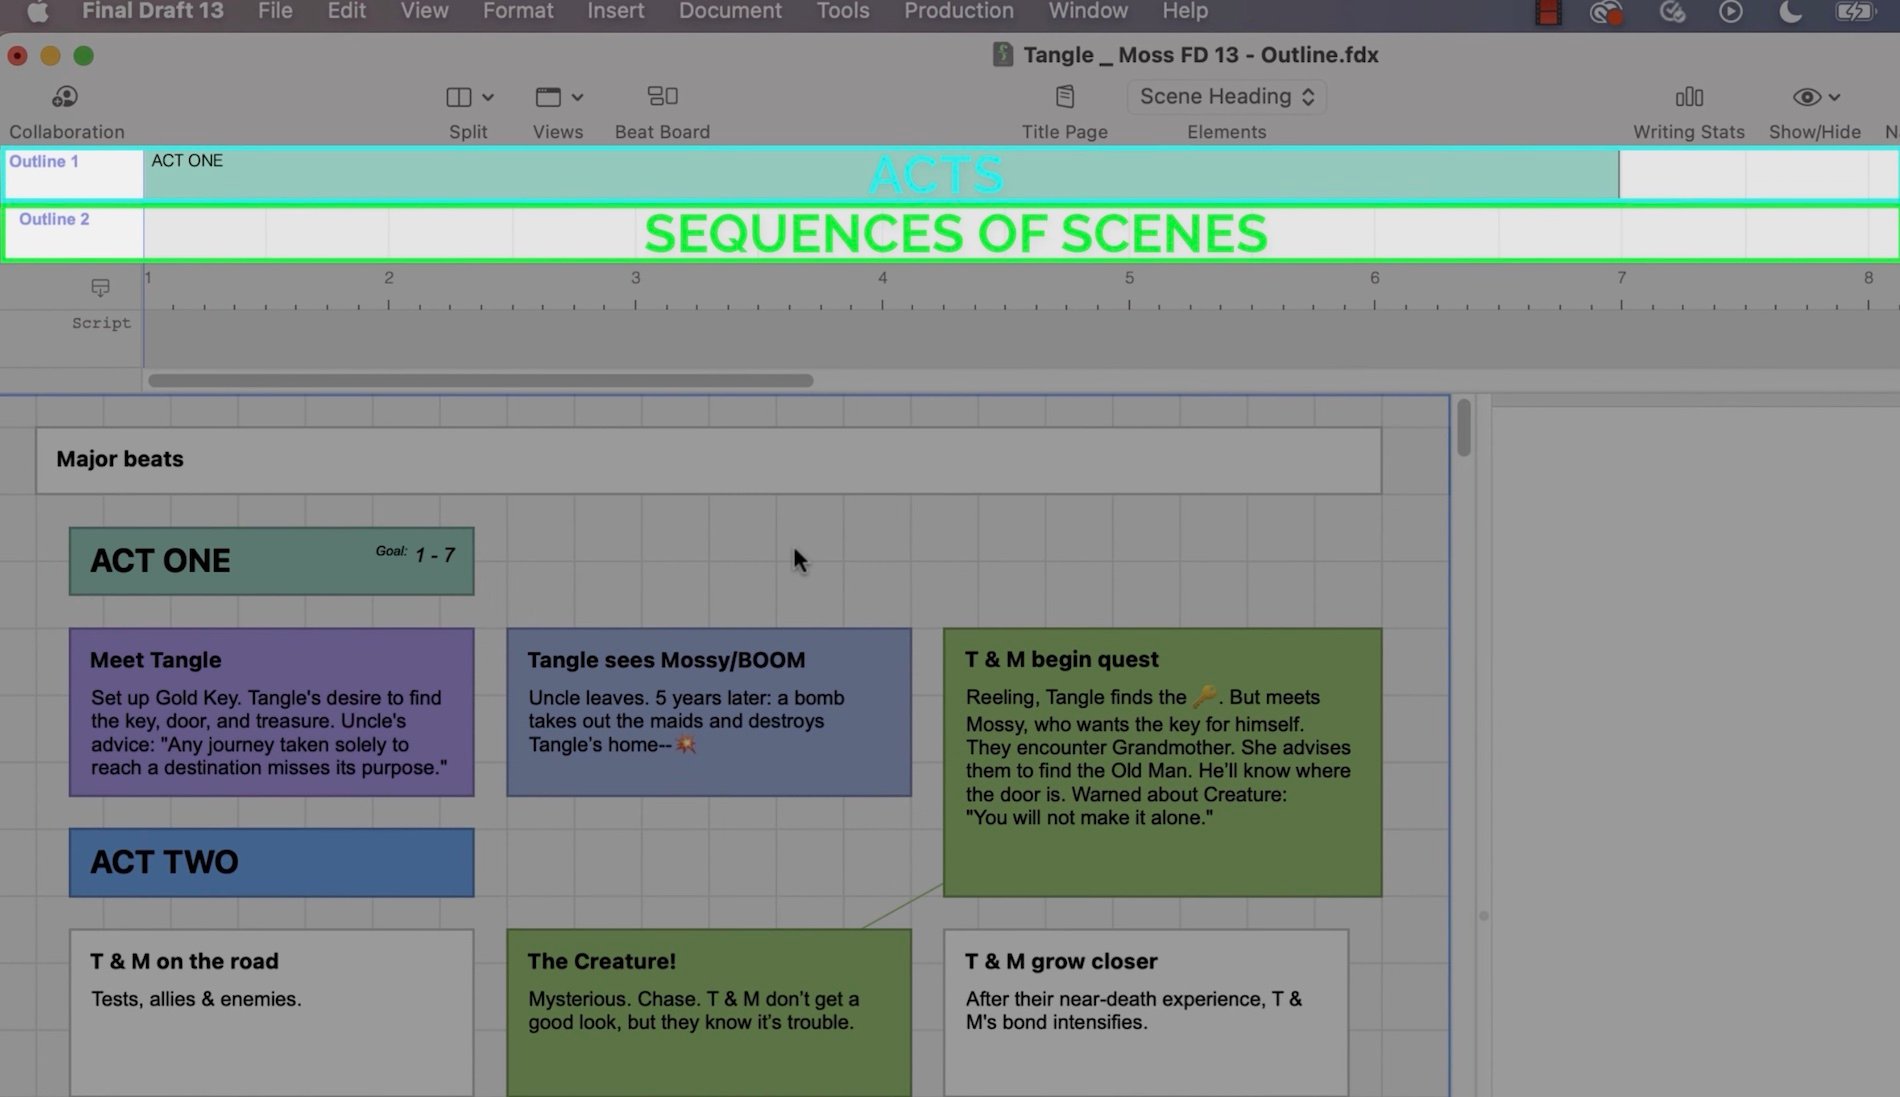
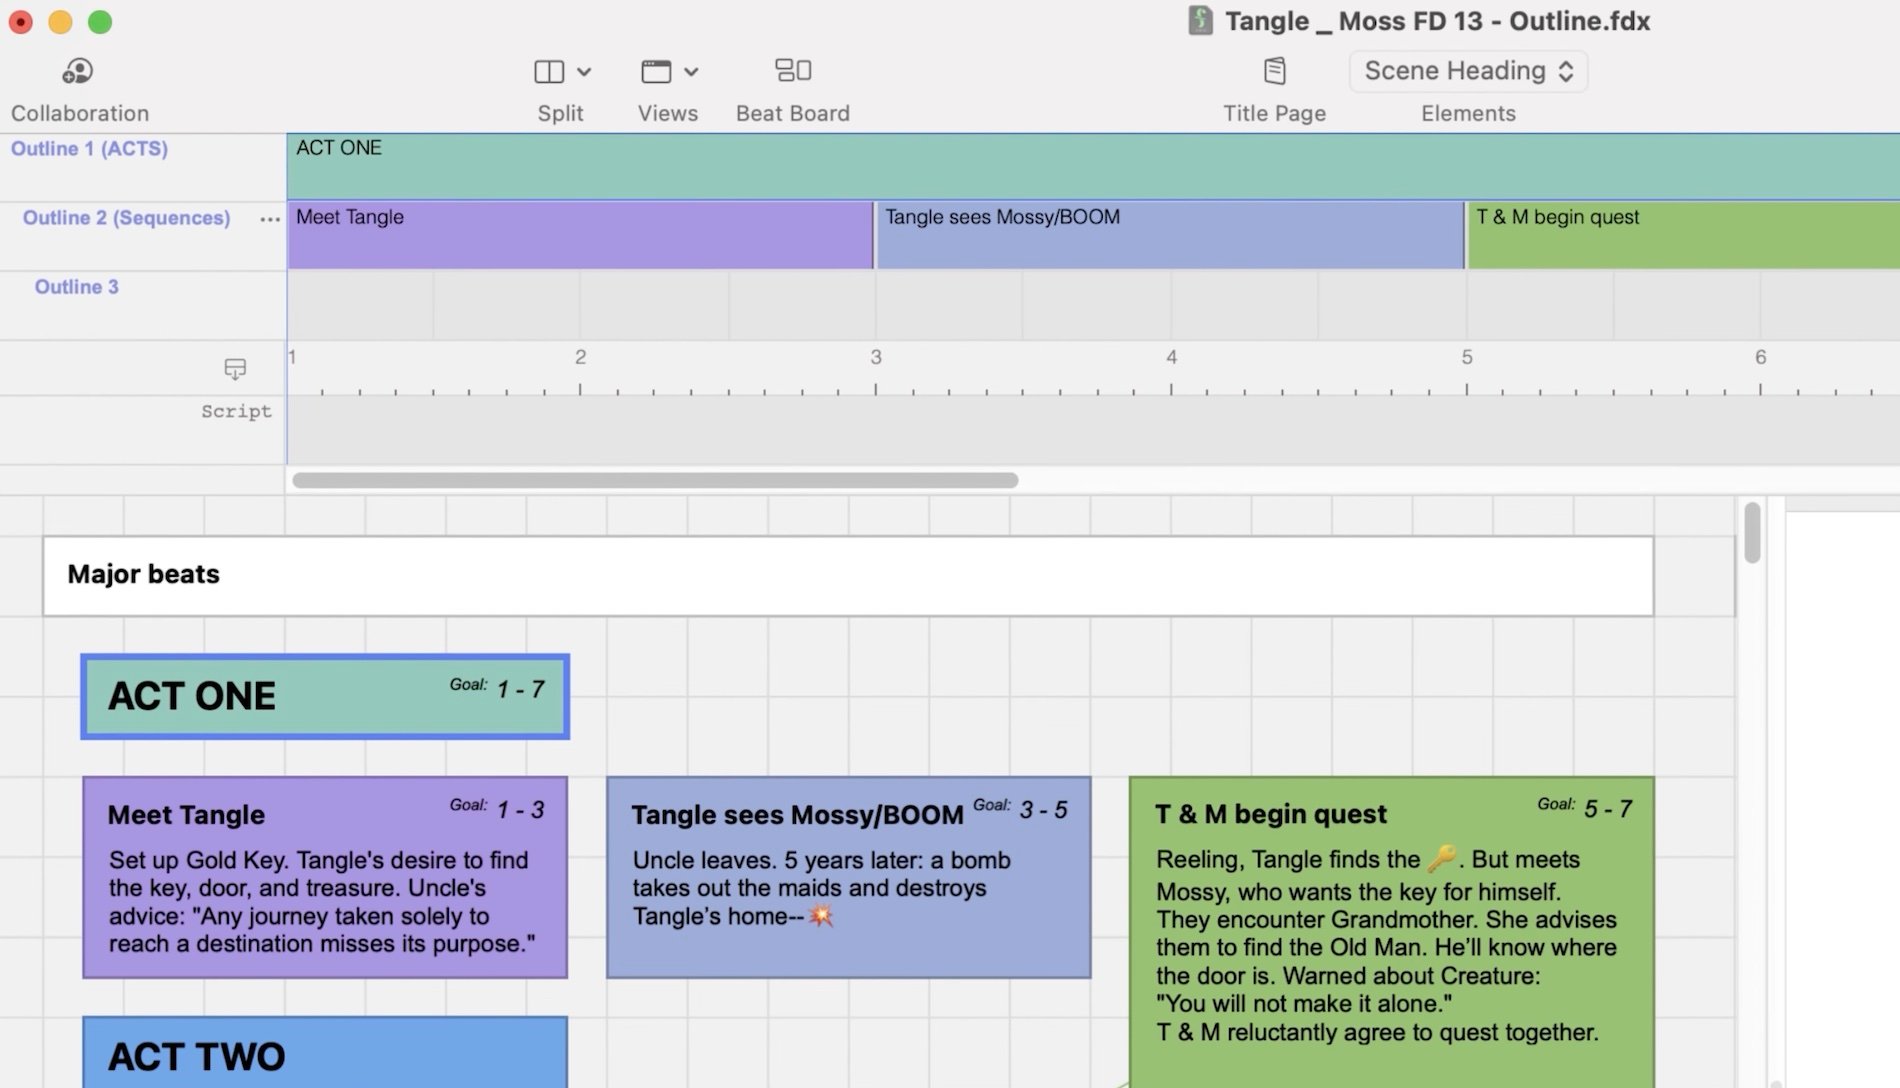
The Outline Editor’s top two horizontal lanes are labeled Outline 1 and Outline 2. One way to use the dual lanes is for Outline 1 to represent acts and Outline 2 to represent sequences. Beneath these two lanes is a numbered lane, resembling a ruler, which represents the page numbers of your script (aka the Page lane).
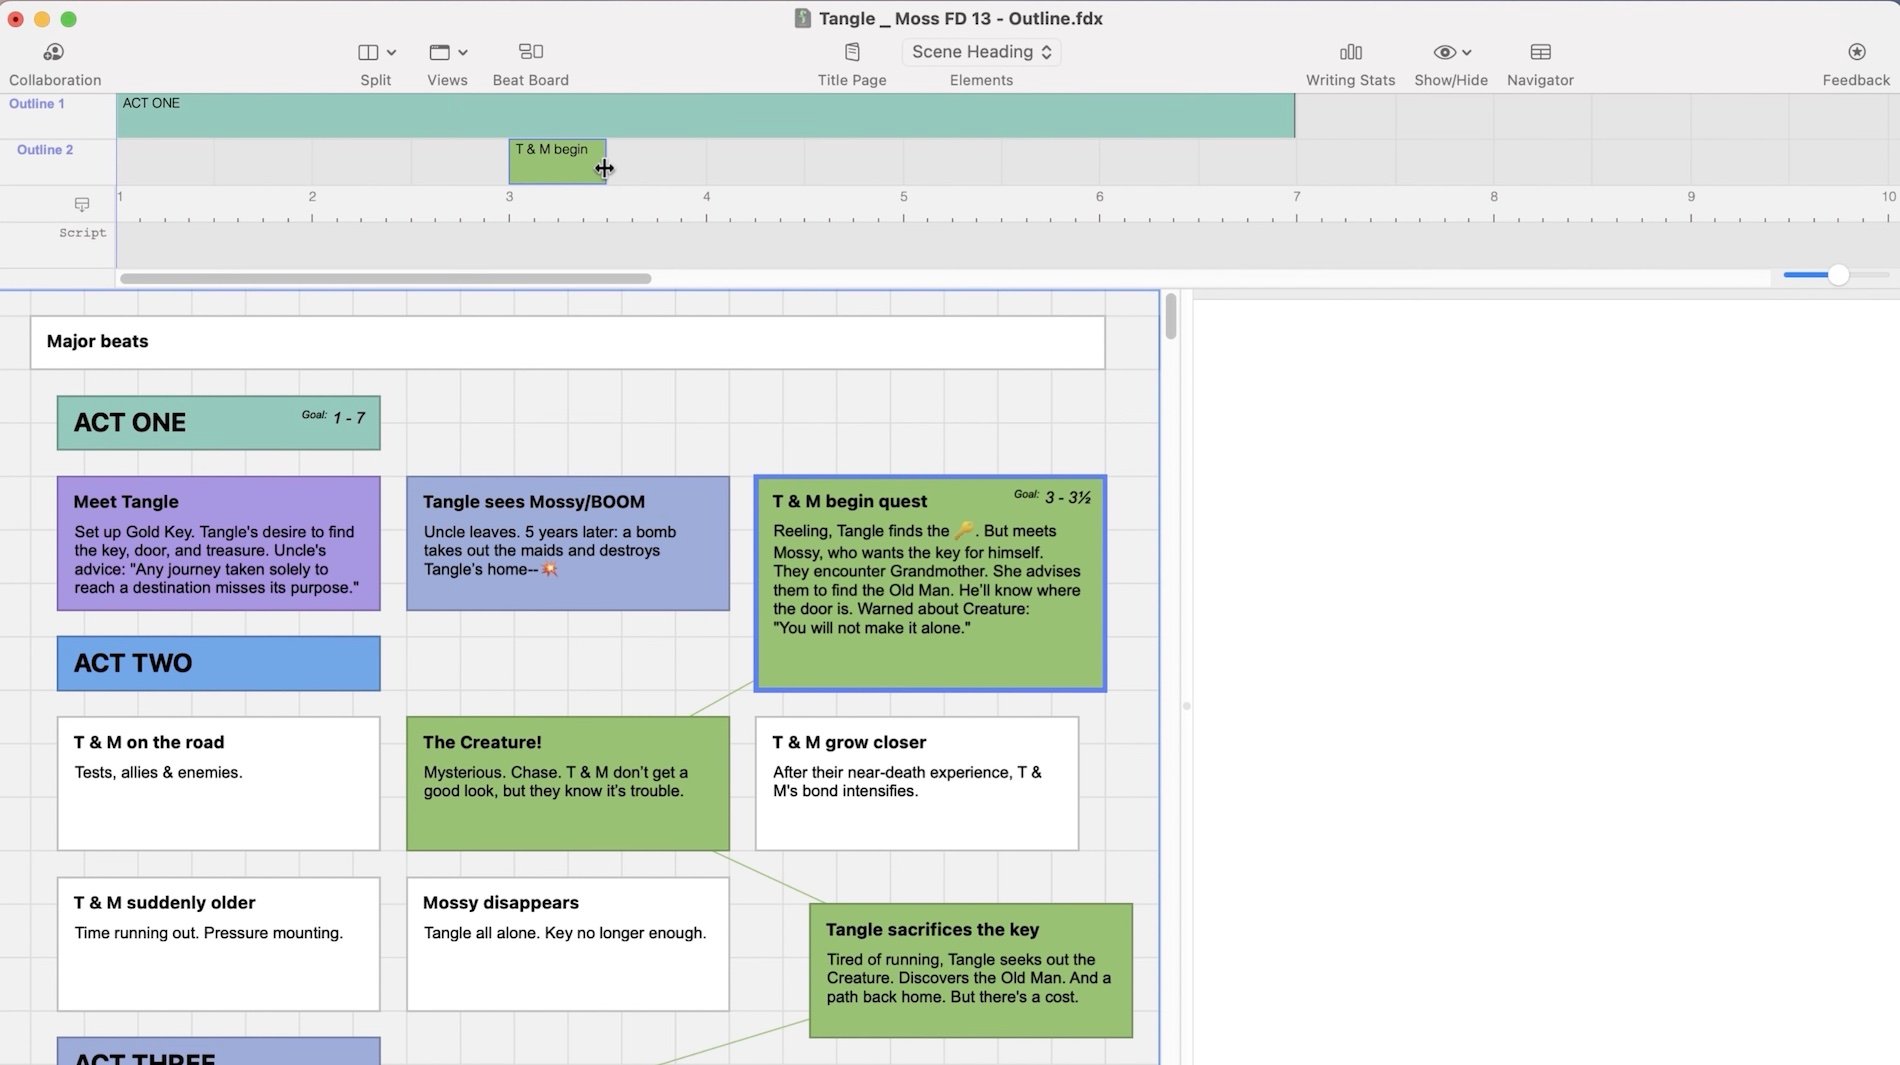
The Page lane helps you know where your scenes occur in your script. If you’re writing your script and want to check to see if a character introduction or specific event has happened on a certain page, view the Outline Editor, find this introduction or event, and look at the corresponding page range beneath the beat.
If you have an idea for an act, sequence, or scene, you can write that idea inside a color-coded beat (utilizing the Beat Board). If you know which page you’d like a specific beat to occur by, simply drag the beat to the appropriate spot of the Outline Editor. An Outline beat in the same color will appear above the page number. The corresponding beat on the Beat Board will update to show the current Outline beat’s page range.
Throughout the outlining process, you can always revise and rearrange your beats. This allows you to improve your outline without having to start from scratch!
As noted, you can construct your entire outline beforehand via the Outline Editor and the Beat Board and then send your outline to a script, but you can always change and modify it when needed during the writing process. Changes made to a beat will update in the Beat Board. Changes made to the actual script will be reflected in the bottom lane of the Outline Editor (aka the Script lane).
Read More: What is a Beat Board, anyway??
Customized Outlining is Better Outlining
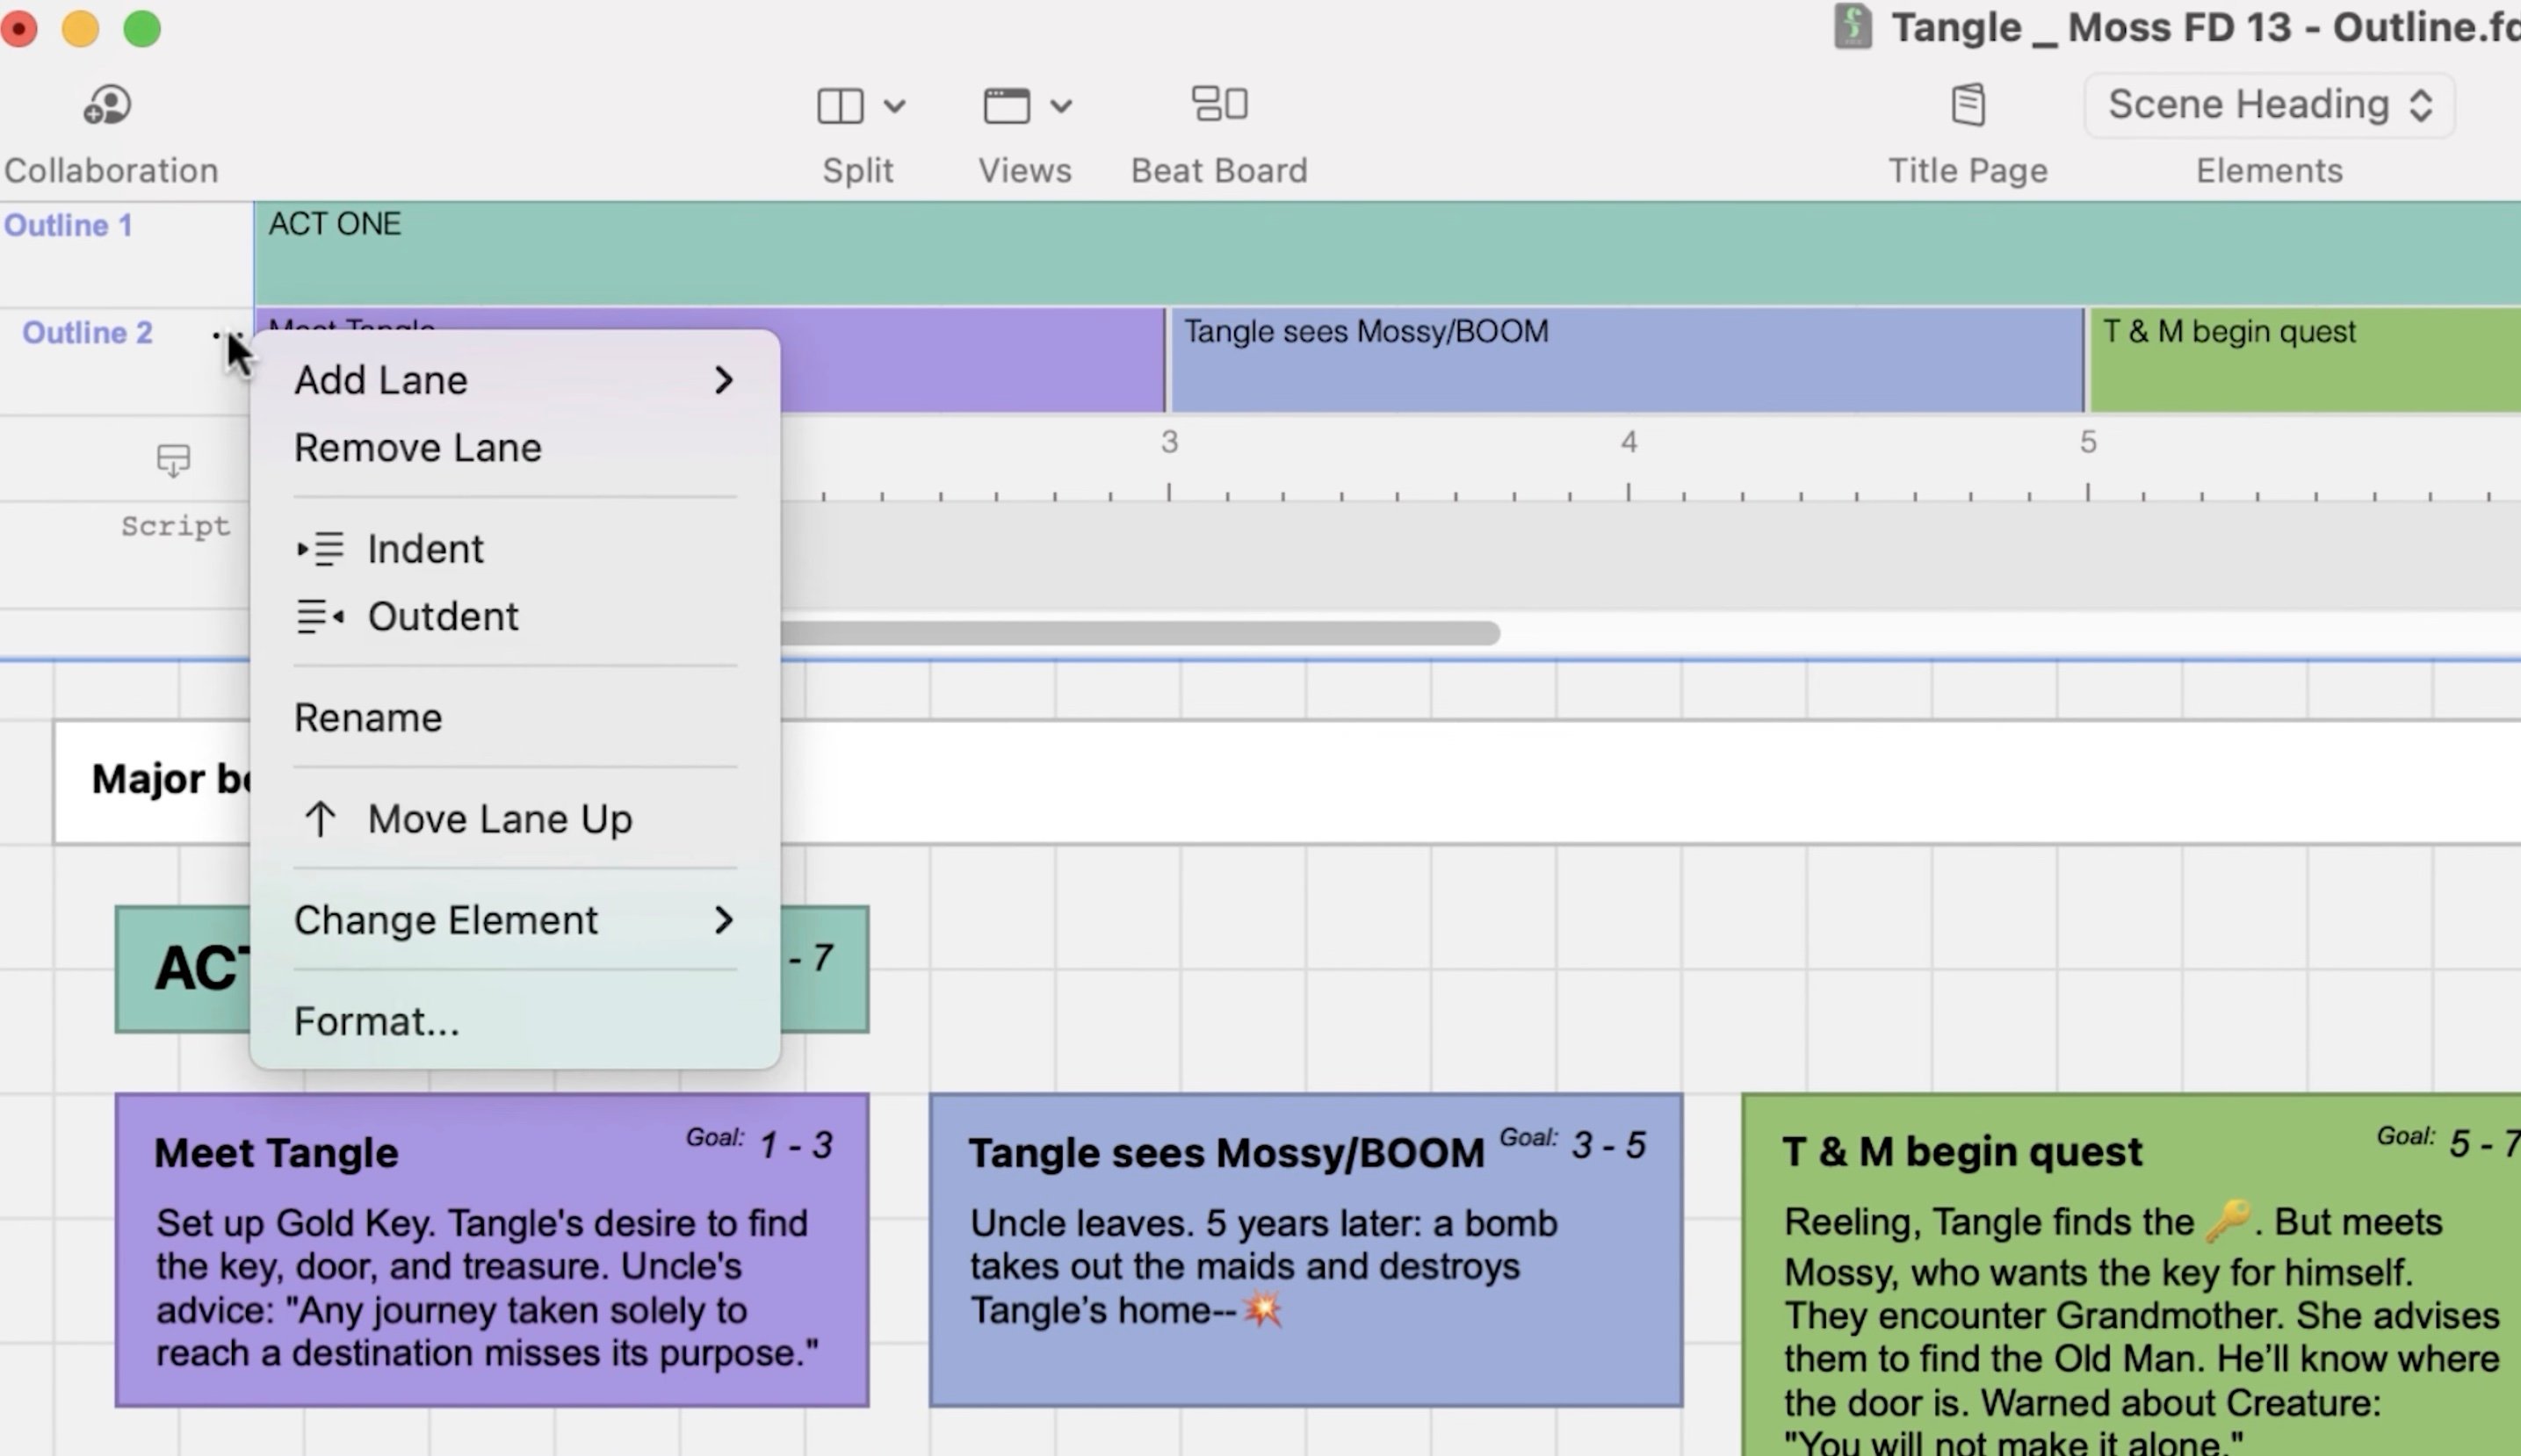
Customizing your outlining to your sensibilities and working methods leads to greater productivity. That’s why one of the new features of Final Draft 13 is a more customizable Outline Editor. You can now add, remove, name, and rename customizable lanes.
To access the lane menu, hover any outline lane and show an ellipsis and click on the ellipsis to open the menu. The menu offers options like “Add Lane,” allowing you to add a blank copy of any existing lane or a new original lane (e.g., an Outline 3 lane beneath the Outline 1 and Outline 2 lanes). If you use the first two lanes for acts and sequences, you can use this third lane for scenes.
Each outline lane will correspond with an outline element in your script elements list. You can rename an outline lane and corresponding element by choosing Rename from the lane menu and pressing the “Return” or “Enter” key. You can move outline lanes, change lane elements, and Indent or Outdent to change hierarchical levels (e.g., acts, sequences, scenes, etc.).
You also have more viewing options than in past versions of the Outline Editor, and you can see outline element styles in lane names and view your outline in the Script lane.
The more you’re able to customize your outlining, the easier and more intuitive it’ll become. Again, we’re all wired differently. Take your time and explore different ways of outlining.
Eventually, you will find what works best for you and your writing.
Read More: 5 Tips To Starting a Screenplay